Showing posts with label DIY. Show all posts

Tuesday, November 9, 2010

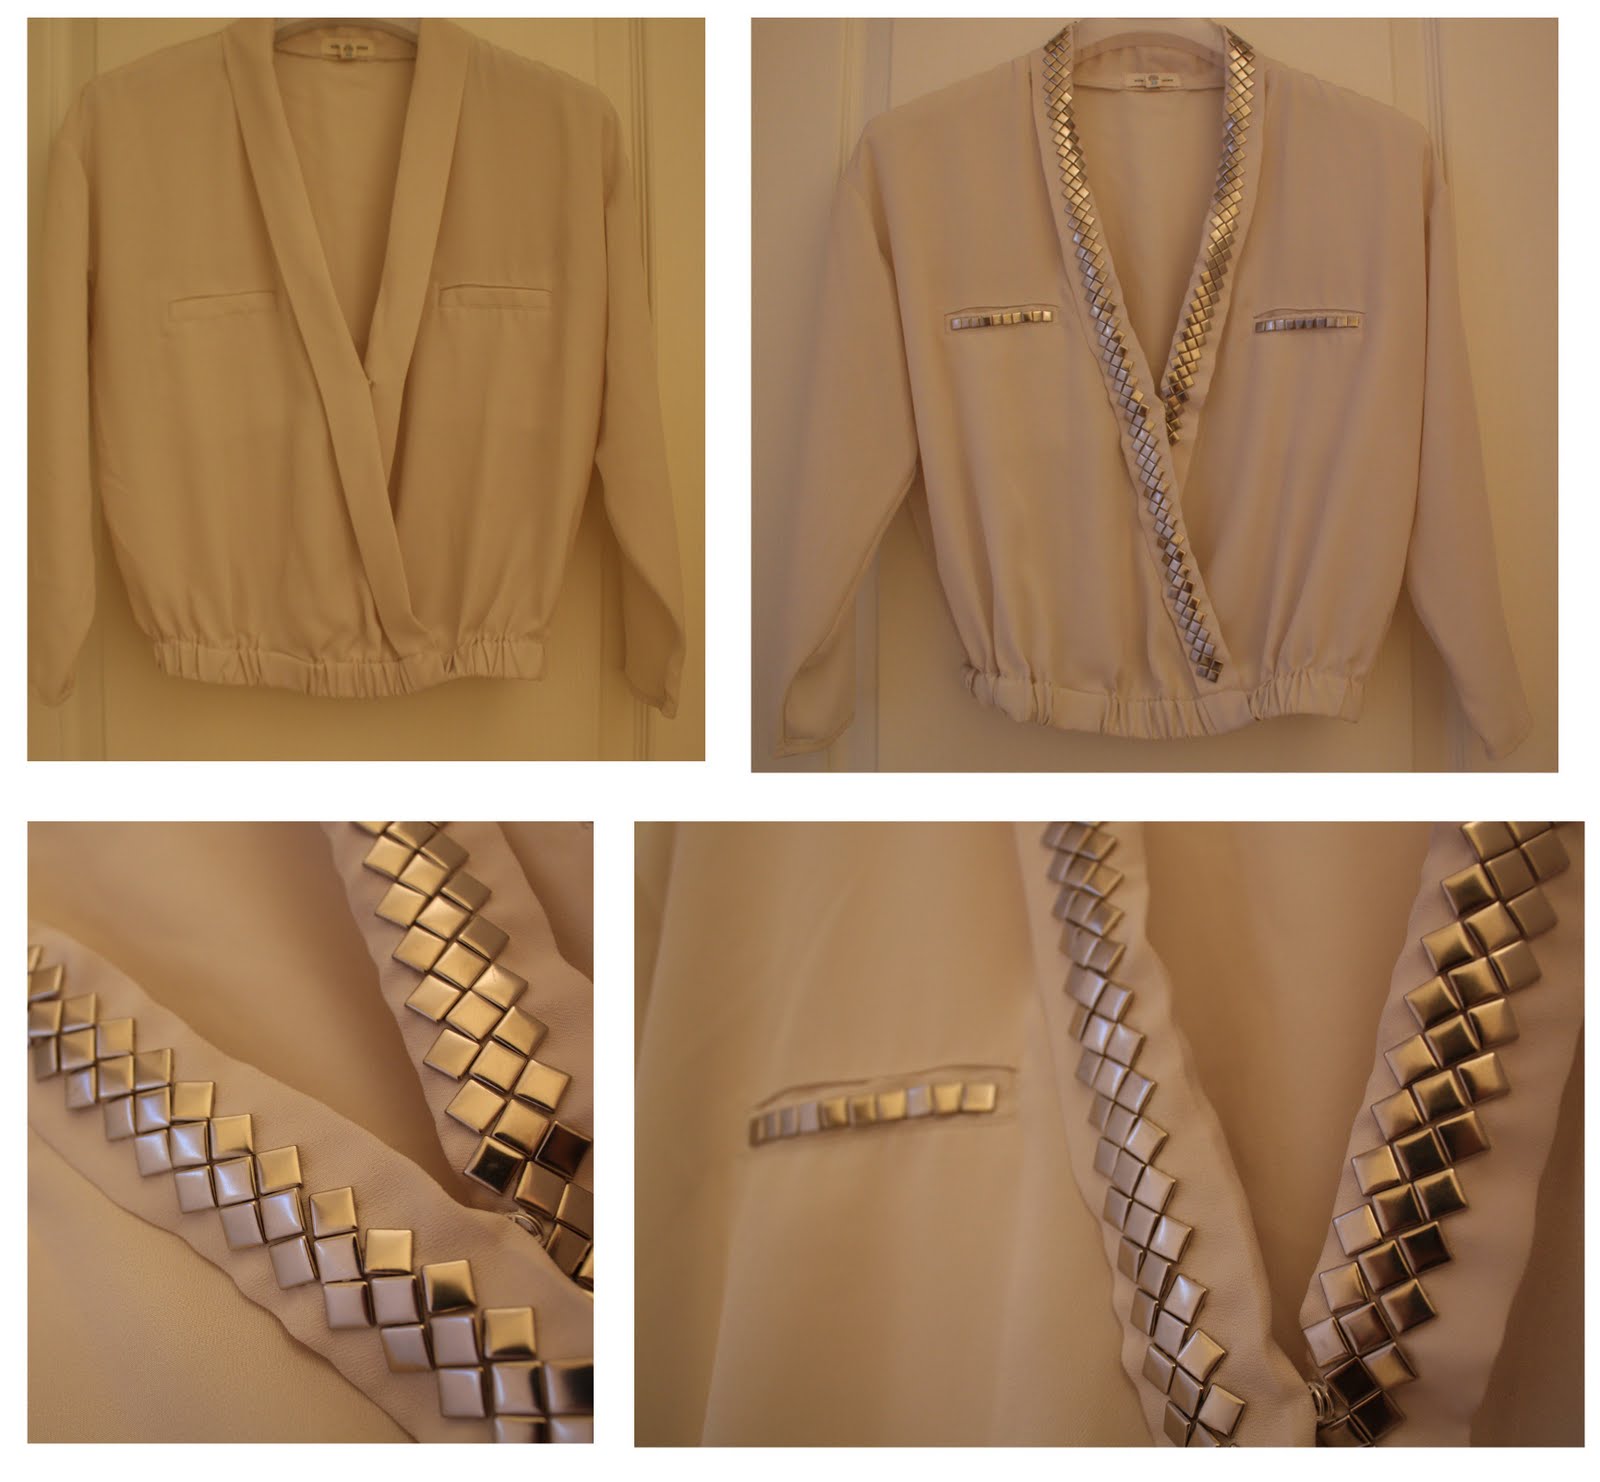
DIY studded top

top, SILENCE AND NOISE + DIY. skirt, H&M. clutch, CLUB MONACO.
photos by Rosanna

I thought it was funny when I showed my mom this DIY top, she said it reminded her of Elvis. Then I took a second look at it and thought to myself "heh, she's right." haha. Studding is probably one of the easiest forms of DIYs and not to mention the endless possibilities our creativity could bring us. When I first saw this blouse, I knew that it would be the perfect 'stud it yourself' project. I always feel that studs automatically put the cool factor to any garment. There's really nothing fancy needed here, just a plain top, vast amount of studs, and a sprinkle of imagination :) Vision the pattern before starting because there's no room for mistakes [the teeth of the studs will leave holes]! Read my previous DIY post for more ideas.


tip: Studs could get really heavy, especially with the 200+ I've used, so make sure to pick a thicker fabric to avoid it from scrunching.

Wednesday, April 21, 2010

DIY Studs Headband


photos by sherry and me


1) Materials: 0.8 to 1.2 meter of black velvet ribbon, assorted gold square studs, and 1 pair of small snap buttons

2) Measure the length of ribbon you need to fit around your head, leaving approximately an extra 3-4 inches on each end. Pin the area where you want the large studs to be placed on the headband prior to securing the studs on. Then, secure the small studs by equally spacing them from one another. This is where creativity takes part in the project. Play around with the variations; pattern it however you like!

Tips: Make sure the backing of the studs are firmly pressed down flat to avoid them from catching onto your hair.

3) Try the headband on and mark the midpoint on where the two ends meet at the back (one overlapping another). Sew on the snaps accordingly.

4) After the snaps are sewn, hide the stitching with a large stud and trim the two ends so that they are in matching length.

5) Ta~Da :)

You always have options: Instead of using snaps, you can try just tying a bow at the back (approximately 1.5-1.6 meter of ribbon will be needed). For something more dramatic, loosely braid two to three headbands together.